How to enable Timeline in Facebook?
Posted By Saimatkong on Dec 19, 2011 | 0 comments 8,523 views
What’s Facebook’s Timeline? Have you heard of Timeline in Facebook? Do you find Timeline cool and awesome? Yes indeed it’s a better way of sorting and presenting your Facebook profile and it’s more organized according to the time that you posted or being tagged in Facebook!
Have you enabled your profile Timeline in Facebook yet? If not here’s some simple tip on how to enable it!
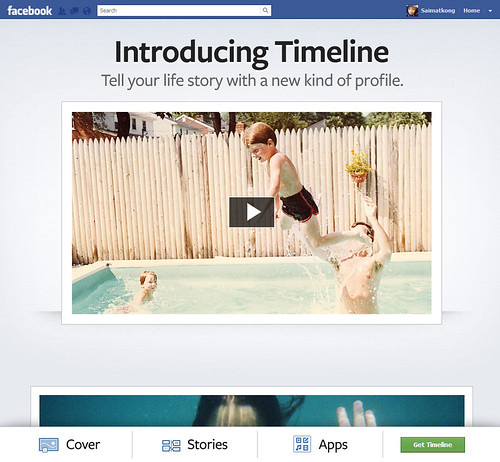
Facebook’s Timeline
Here’s some simple way of enabling it instead of some tedious way of doing it few months back! Now, it’s a whole lot easier, you can enable the Timeline in Facebook with one click yes only 1 click! Then publish it for all to see with one more.
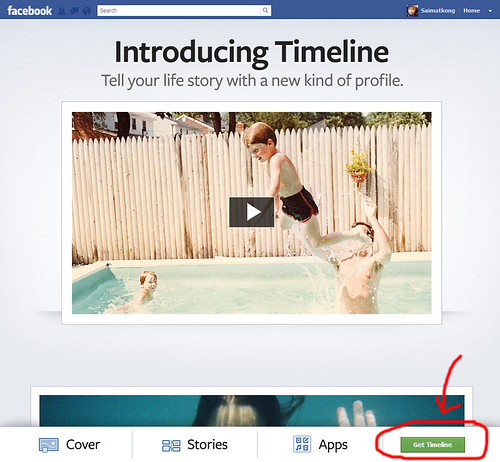
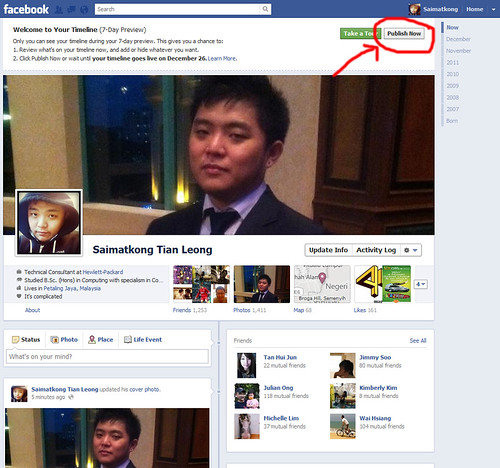
The best part is, after you click the “Get Timeline” button, you have seven days until it automatically goes live, but until then, you’re the only one who will see it until you authorize it to be published. However, if you don’t want to wait seven days, you can publish it any time by clicking “Publish Now”.
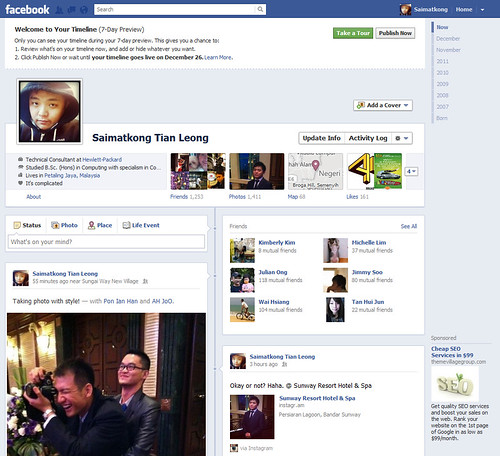
So for 7 days after you opt in, you can go through and edit whatever you’d like to hide from all your Facebook friends and followers, making sure your privacy is intact. Once you’ve pruned your Facebook Timeline to your comfort level, click the “Publish Now” button, and all your timeline goodness is immediately displayed for all to see.
Go here : http://www.facebook.com/about/timeline
Click “Get Timeline.” There. It’s enabled, but not published yet.
Click “Publish Now.” You’re done.
Here’s the Simple Steps on enabling your Timeline in Facebook!
1. Be sure you’re logged into your Facebook account.
2. Go to the About Timeline page.
3. Click on “Get Timeline.” (As shown in the print screen above)
4. Scroll down on your timeline and edit or remove any items you don’t want shown. Do that by holding your cursor over the upper right of the item you want to edit, and then make your choice on the drop-down list.
5. From that list you can change the date of the item, add a location, hide it from the timeline, delete the post altogether, or report it/mark it as spam.
6. If you’d like to “feature” any of the posts, click on the star icon to the left of that pencil icon, and that item will be expanded all the way across the page, made larger for all your friends to see.
7. Once you’re satisfied with all the edits you’ve made, either go back to the top of the Timeline and click “Publish Now” or do nothing and it’ll be automatically published on December 22.

Start with your cover on your Facebook Timeline
Your cover appears above your profile picture, and it’s the first thing people see when they visit your timeline. Choose a unique photo from your life to feature on your cover.
Note: Just like profile pictures, your cover photos are public.
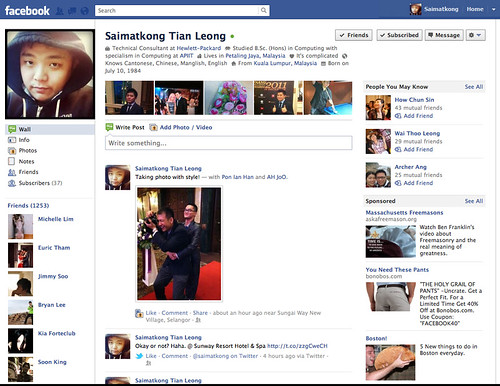
Here’s my old profile without Timeline. Do you feel it’s better looking and better presentation in Timeline?
Fast fast go Update your Facebook’s Timeline now~!